

Making straight ducts
Making fitters
Installation of ventilation ducts
Circumferential reinforcements
Auxiliary materials
Parameters of auxiliary materials
Making of ventilation ducts
Ducts in the Climaver system can be made on the construction site using a small amount of tools.

Making Straight Ducts
To make a straight duct, we need a basic Climaver MM Tool Set and a Climaver MM angle iron. First, according to the rules given in additional instructional materials, we measure the board for the proper duct and mark the cut lines. Then, with a suitable tool, we make cuts in the board (grooves) at the bends places (1). The board cut strips we remove from the grooves and set aside.
If we make ventilation ducts in the Climaver Metal System, insert the Perfiver L profiles (2) along the fold line into the grooves. The plate prepared in this way (3) we fold to obtain a single section of the duct (4). The last step is to make a solid and tight longitudinal connection of the duct by using a suitable stapler and Climaver aluminum adhesive tape.
For more information, we encourage you to watch the instructional video that we offer on the CD, and to read our brochure presenting the details of making straight ducts and fitters from Climaver boards.
|
|
|


|
Climaver MM tools with plastic handles for cutting Climaver boards |
|

 |
 |
 |
Tool with red color.
Performs a "breech" cut for folding walls at 90o
|
|
|

The tool with blue color.
Treats the end edges and leaves a tab for duct closure.
|
|
|

The tool with black color.
Machines the edges necessary for cross connections.
Making fitters
Almost every fitter (elbow, triform, offset pipe) can be made using the STRAIGHT SECTION METHOD, which means that it can be created by easily transforming a straight section of the duct. Below was shown the way of making a fitter by using this method on the example of the Climaver Metal System.
|
|
|


Performing a ventilated elbow using the straight section method
The apply angles are: 22.5o and 90o (a). Properly measured and traced straight section of the duct we cut (at right and diagonal angles) (b). The parts obtained in this way we put together properly by gluing the contact points (c) using special Climaver glue. Then, with Climaver aluminum adhesive tape, we reinforce and seal all external connections of the fitter (d).
The method of cutting fitters shown above, i.e. using a circular saw equipped with a dust collector, is recommended only for the Climaver Metal System due to the Perfiver L profiles. If these profiles are not present, we use the tools from the set to cut the fitters (white color - right angle; yellow color - 22.5o angle).

The outer coatings of the Climaver boards have a printed special mesh, which the lines of it make much easier to cut the ventilation ducts at the correct angles.
Installation of ventilation ducts
Transversal connections between elements. Edges on "overlap"
The factory-profiled male and female edges of the boards enable the execution of solid and tight "overlap" cross connections between individual sections. In case when necessary is to make shorter section of the duct than the standard one, it is possible to make the male or female edge yourself using the tools from the set.

The unique "overlap" edges of the Climaver boards allow for easy and quick ducts making and also their installation. The higher density of glass fibers in the edges of the boards increases the quality of the connections. On the picture above, the arrow shows the correct direction of air flow.
Average consumption of auxiliary materials
On average for 100 m2 of a CLIMAVER duct board accures:
- 5 rolls of aluminum tape,
- 1 pack of staples,
- 2 bottles of glue
Distances between supports
Values was calculated based on current standards for non-metallic air ducts:
|
Maximum internal dimension (mm) |
Maksymalna odległość (m)
|
| a < 900 | 2.4 |
| 900 < a < 1.500 | 1.8 |
| a > 1.500 | 1.2 |
For supports, should be used sheet metal profile in the shape of ![]() with dimmensions 25x50x25 mm.
with dimmensions 25x50x25 mm.
Circumferential reinforcements
The high rigidity of the Climaver boards allows for the execution of long sections of ducts without reinforcements. However, with higher pressures and larger cross-sections of channels, it is necessary to use reinforcements.
Position of reinforcements at cross connections
|
HYPERTENSION
UNDERPREASURE
|
|


To make the ducts in the CLIMAVER system, apart from the boards, we also need a few auxiliary materials:
Staples
 |
Staples are used to connect two vapor barrier coatings of boards, to helping this way with initial formation of ducts. |
 |
Staples are applied with a special stapler. |
Aluminum tape
 |
A special self-adhesive aluminum tape with a thickness of 50 µm is used for external sealing and connecting individual sections of ducts. Thanks to the appropriate parameters of the using tape, it is possible to obtain high tightness of the ducts. The guarantee of the tape quality is a printed CLIMAVER or UL 181 A-P trademark on it. |
Thermoweldable aluminum tape
|
|
To connect Climaver ducts there is also used aluminum weldable tape. This tape adheres perfectly even in difficult conditions, when glued surfaces are dusty or damp.
|


CLIMAVER glue
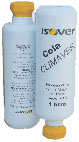 |
CLIMAVER glue is a special acrylic adhesive for mineral glass wool boards, used for gluing parts of ducts during making parisons, giving them greater strength. Straight sections of ducts are making without the use of glue. |
By using Perfiver aluminum profiles, we obtain the CLIMAVER METAL SYSTEM
Profiles PERFIVER®
Two types of embossed aluminum profiles:
PERFIVER H:
|
|
They are used to process all edges of Climaver boards in the case of various connections with metal elements of the installation (air-conditioning devices, grilles, diffusers, dampers, fire dampers, inspection openings, etc.). |

PERFIVER L:
|
|
This profile strengthens and seals the internal longitudinal edges of the ducts and increases the resistance of the ducts to mechanical cleaning by brushing. |

The use of Perfiver L profiles is recommended when:
- in the ducts will be a pressure higher than 500 Pa or an underpreasure lower than -500 Pa
- it will be necessary to clean the ducts more often than specified in the PN-EN 13403 standard
According to the PN-EN 13403 standard, the ducts should withstand 20 full cleaning cycles (once a year for 20 years). Ducts made of Climaver A2 Black, Climaver A2 Plus and Climaver B Plus boards without Perfiver L profiles meet these standard requirements. If the ducts are installed, for example, in hospital or food production industries, where cleaning is required more often than once a year, then should be used Perfiver L profiles.
L-profiles are installed dry, without the use of glue. The appropriate shape enables tight installation of profiles in the edges of the duct.
The method of installing Perfiver L profiles is shown below:
 |
 |
 |
 |
Individual qualities
| Product | Thickness | Length | Width |
| Profile Perfiver L | - | 1,155 m | - |
| Profile Perfiver H | - | 2 m | - |
| Climaver aluminium tape | 50 μm | 50 m | 63 mm |
| Climaver Termo aluminum tape | 30 μm + reinforcement | 106 m | 76 mm |
| Climaver Deco tape | 180 μm | 50 m | 63 mm |
| Climaver glue | bottle = 1 liter | ||
| Staples Stanley STCR 5019 | pack = 4000 pcs | ||
Transport
| Product | Quantity in a box | Amount of pieces in a box | Carton weight |
| Profile Perfiver L | 92,4 m | 80 profiles | 14,60 kg |
| Profile Perfiver H | 40 m | 20 profiles | 10,60 kg |
| Climaver aluminium tape | 600 m | 12 rolls | 8,80 kg |
| Climaver Termo aluminum tape | 1692 m | 16 rolls | 16,60 kg |
| Climaver Deco tape | 660 m | 12 rolls | 18 kg |
| Climaver glue | 12 liters | 12 bottles | 13 kg |
| Stamples Stanley STCR 5019 | 100,000 pcs | 20 packs | 18 kg |